As soon as you have changed all the settings within Idealpos and restarted the software, ResDiary is at work.
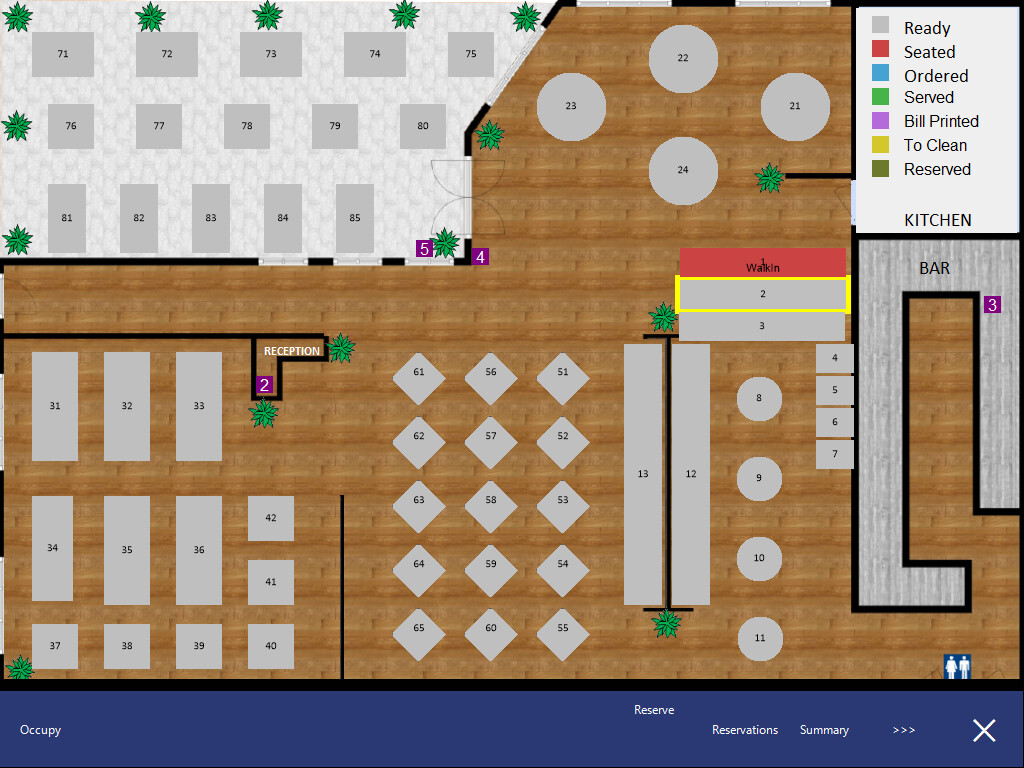
All current and future reservations can be viewed by clicking the Reservations button in the bottom right corner of the Table Map screen.
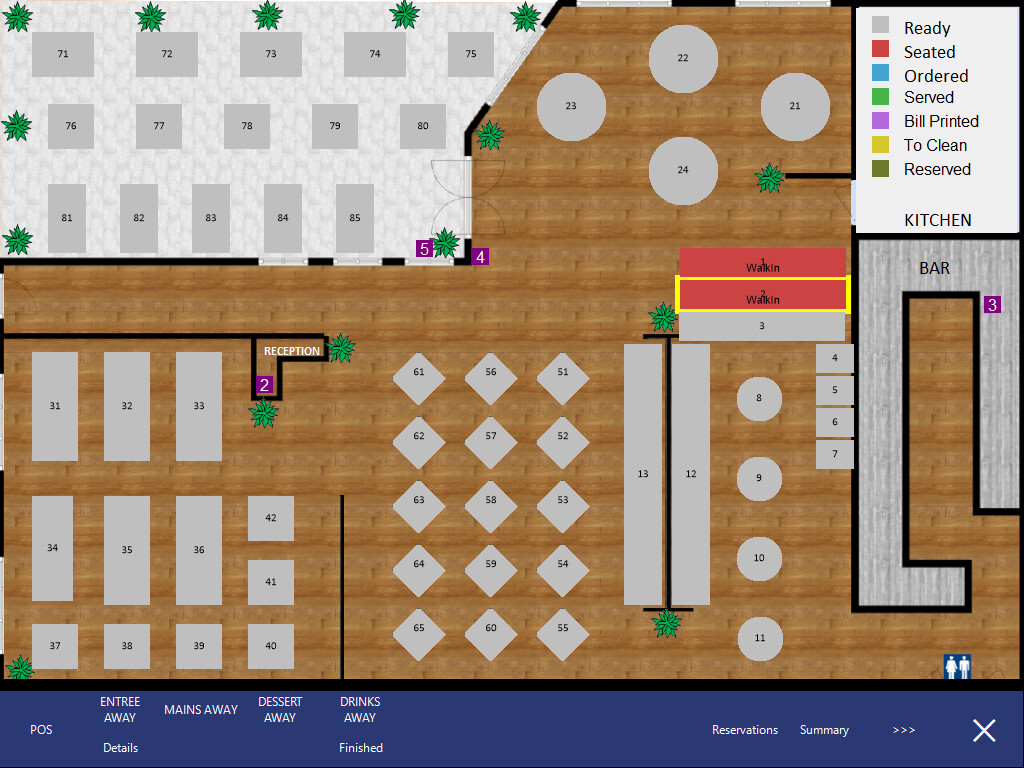
In Idealpos, go to the Table Map.
At any time, you can also press the Reservations button on the POS Screen.

The reservations will be displayed on screen.
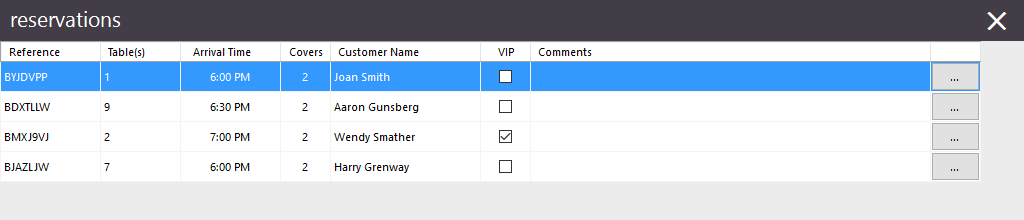
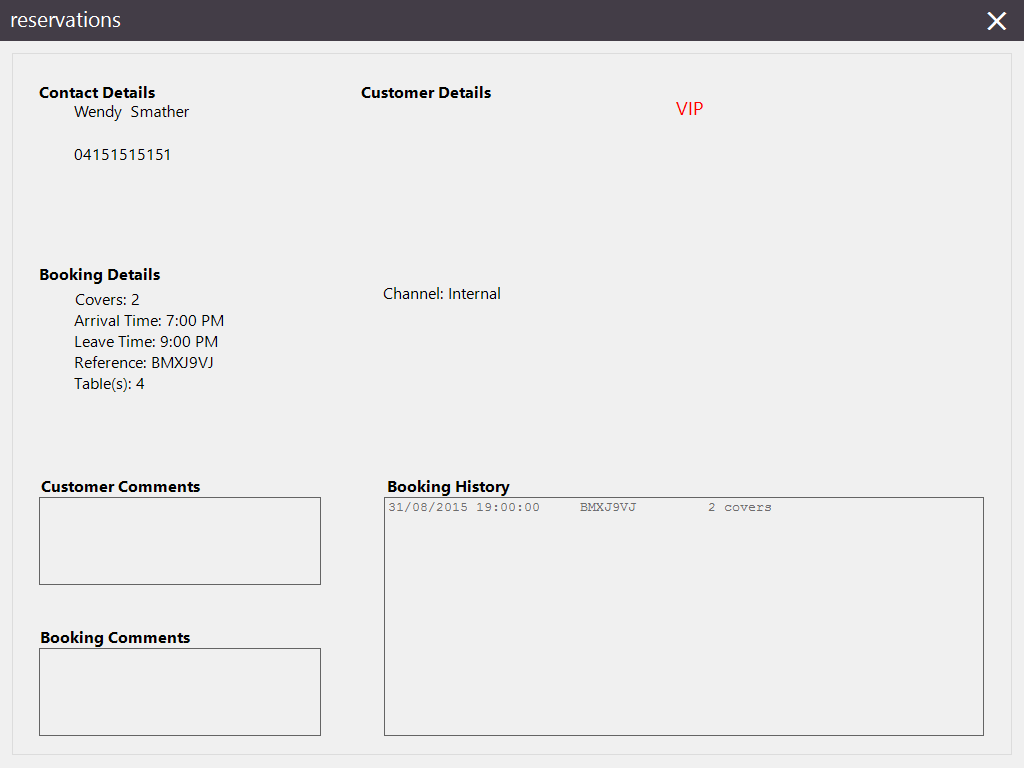
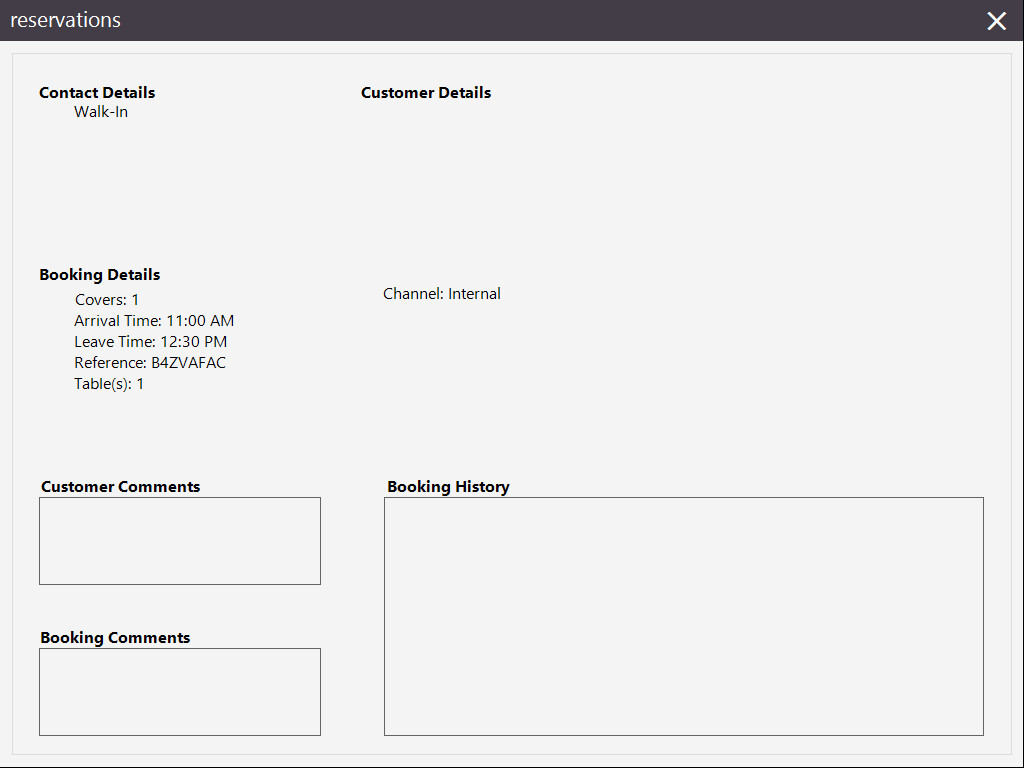
You select the button to the right of each reservation (…) to find out more information on the guest.
A Walk-In guest can be seated at an available table within Idealpos or ResDiary.
Note that when seating a Walk-In guest via ResDiary, the 'Walk-In' guest option is only available if selecting a timeslot less than 30 minutes into the future.
When selecting a timeslot that is greater than 30 minutes into the future, a full reservation will need to be created in ResDiary.
For further details on how to seat a Walk-In guest via ResDiary or Idealpos, click on relevant link below.
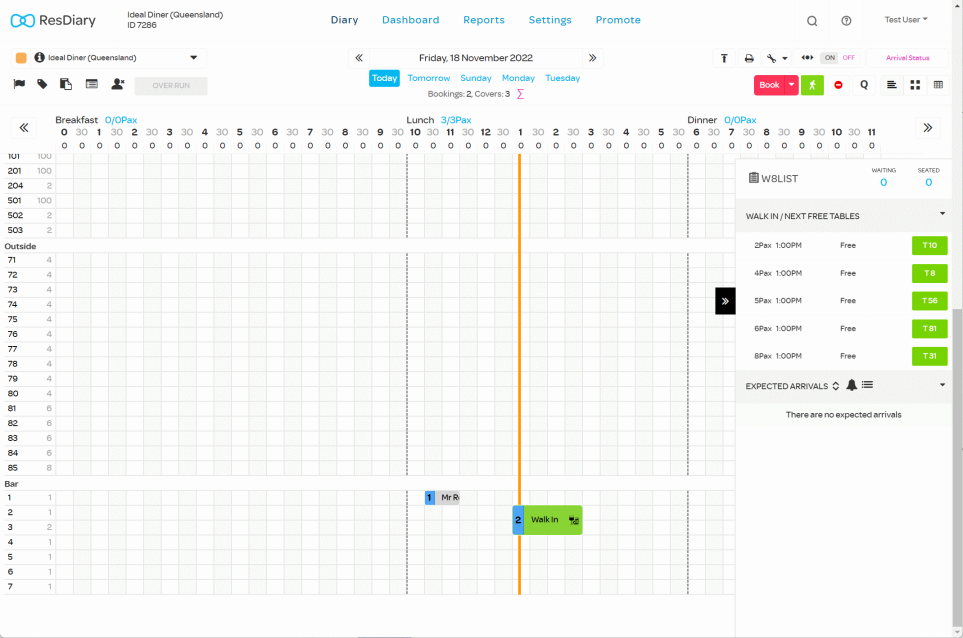
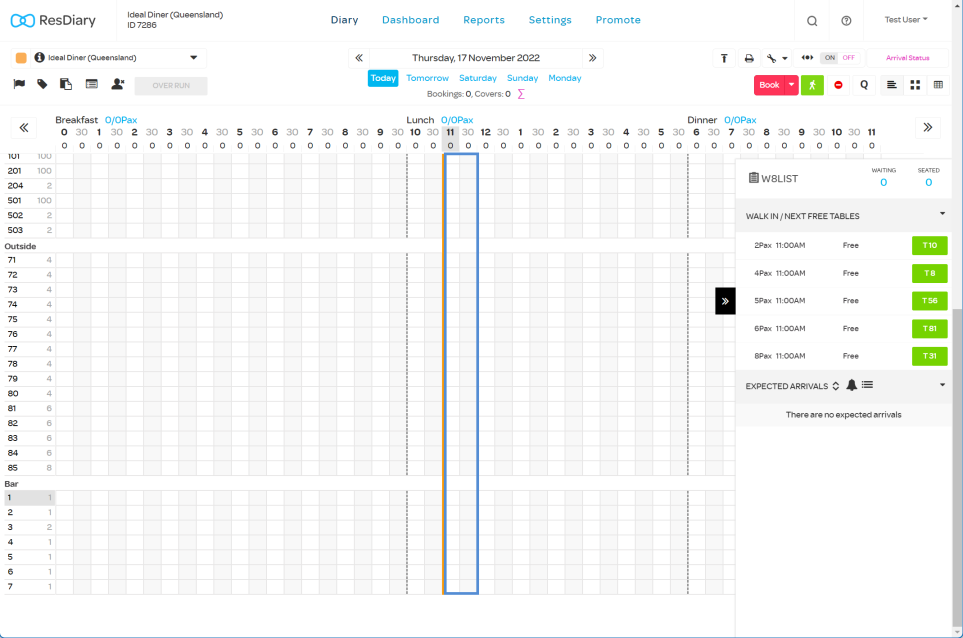
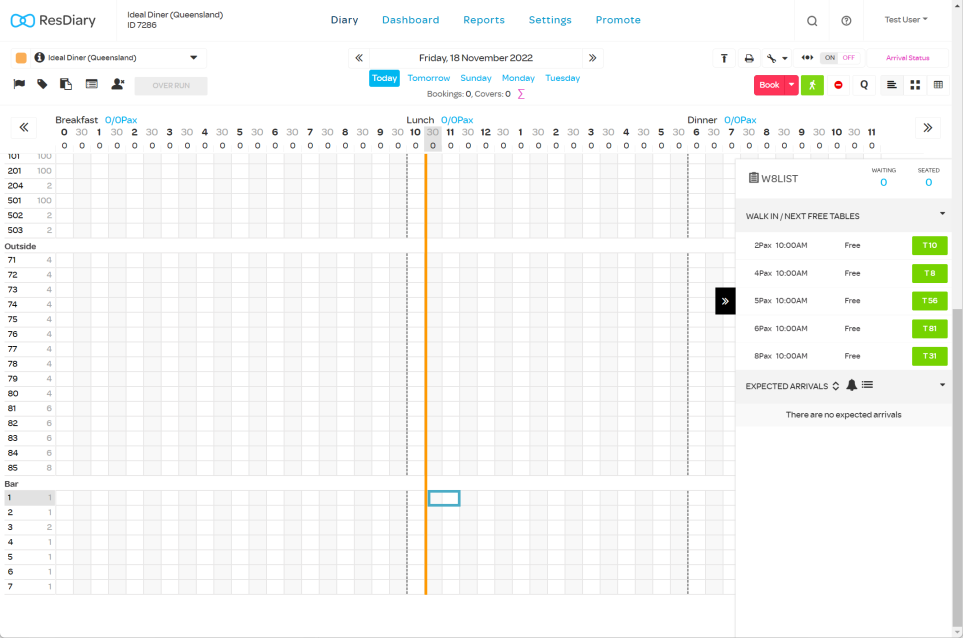
From the main ResDiary screen, select the timeslot on the grid that corresponds to the time that the walk in booking is required.
As mentioned above, a Walk-In can only be created up to 30 minutes into the future.
The below example shows the current time of 11:00AM (vertical orange line running down the grid) with the annotated period of 30 minutes after 11:00AM.
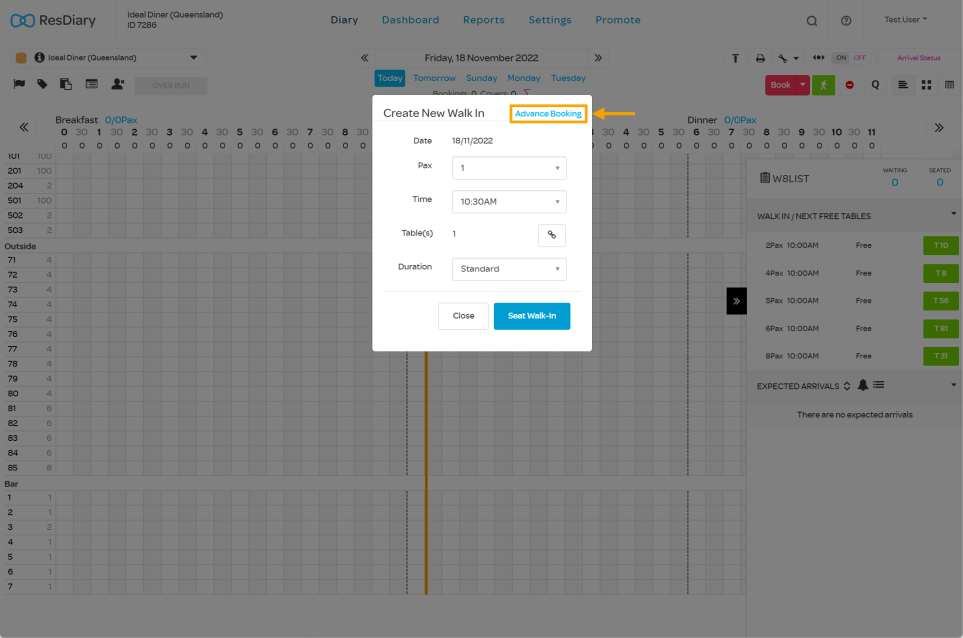
In the below example, clicking into a timeslot in the annotated 30 minute period will display the 'Create New Walk In' prompt (displayed further below).
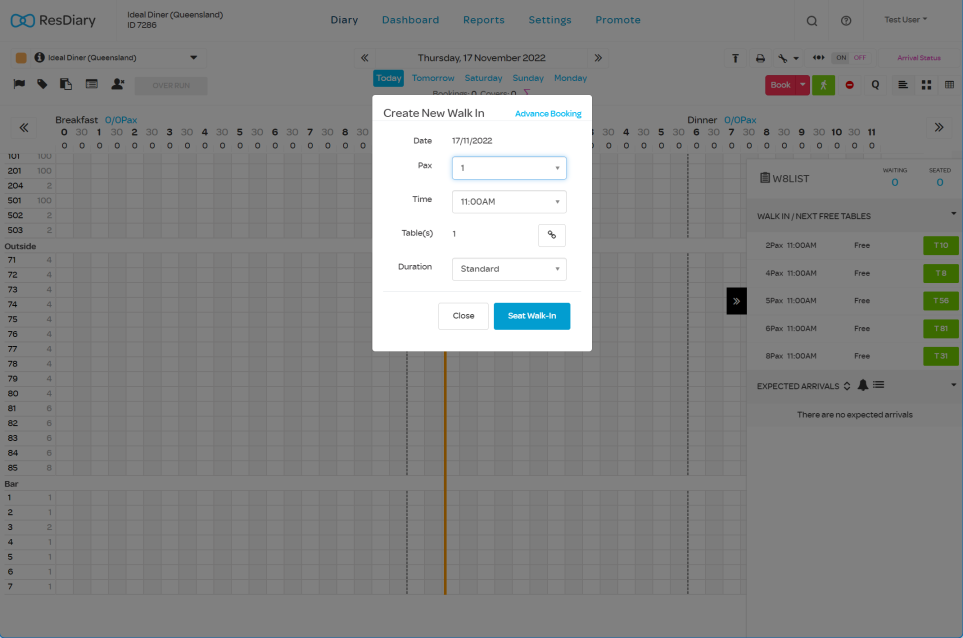
After selecting a table timeslot within the 30 minute window period from the current time (in the above example, the current time was 11:00AM, therefore, selecting a timeslot up to 11:30AM will display the 'Create New Walk In' prompt.
Select the required details and press 'Seat Walk-In'.
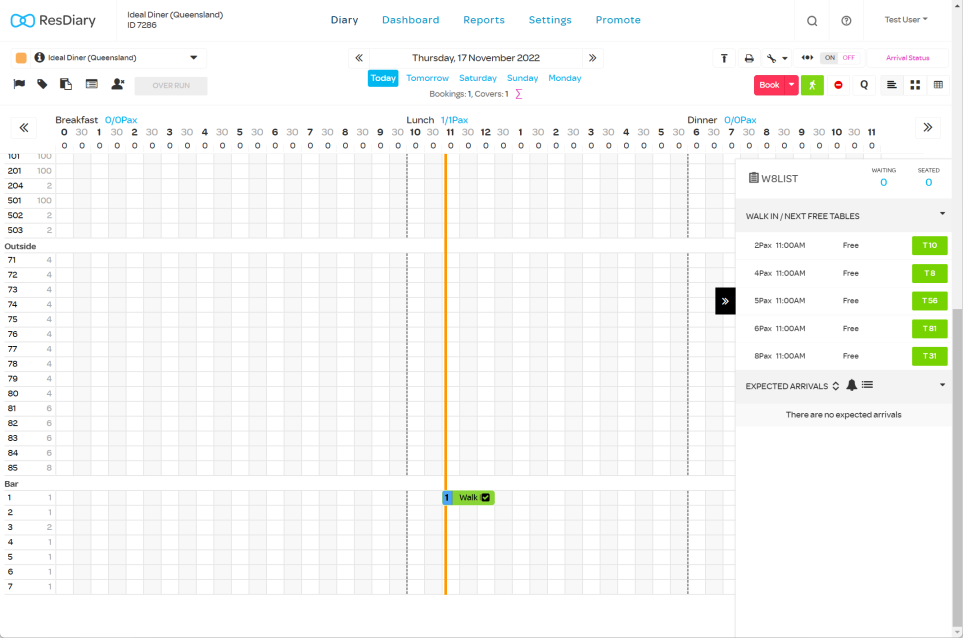
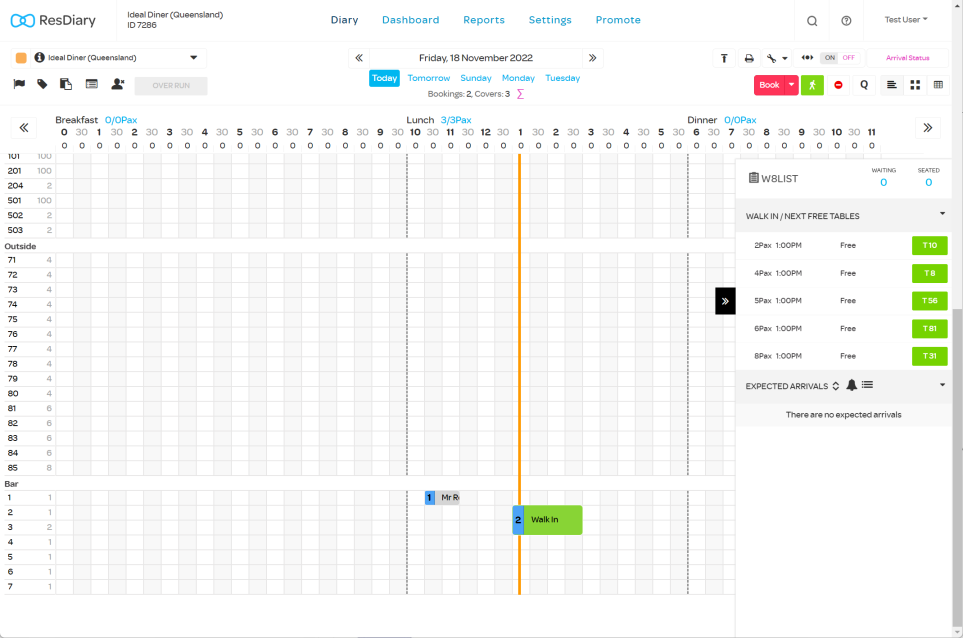
After the Walk In has been seated, the Walk In will appear on the ResDiary grid screen, similar to the below example:
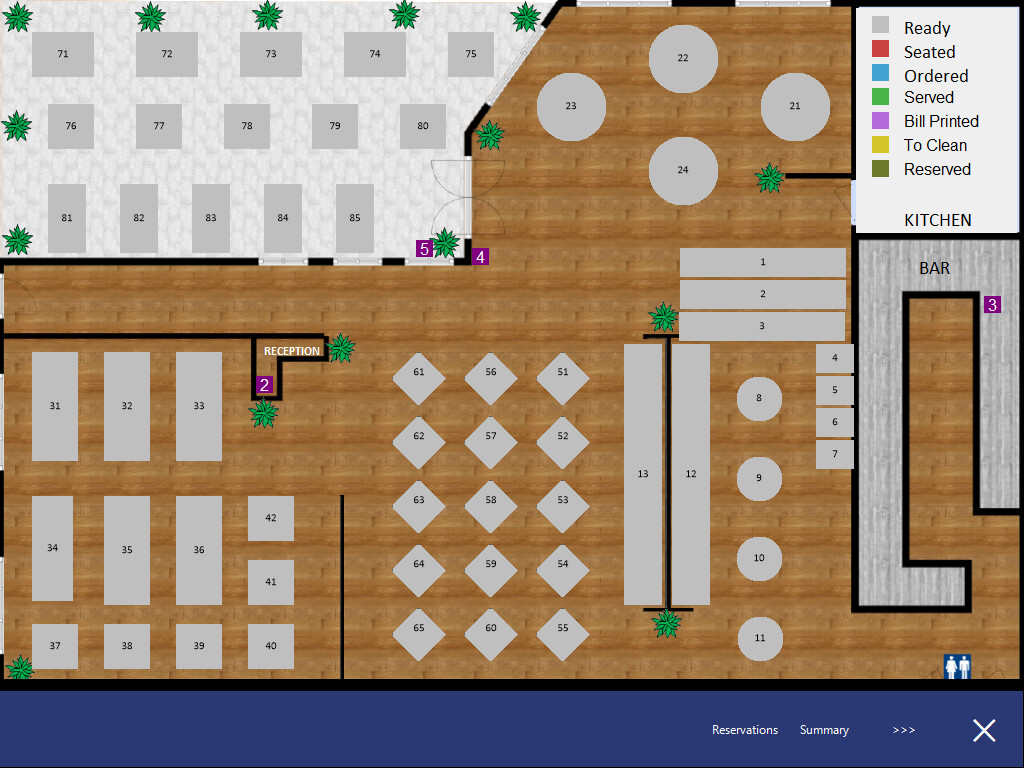
The same Table on the Idealpos Table Map will show the Walk In that was added via ResDiary.

The Reservations button (located at the bottom of the Table Map) can also be pressed and the Walk-In reservation will be displayed.
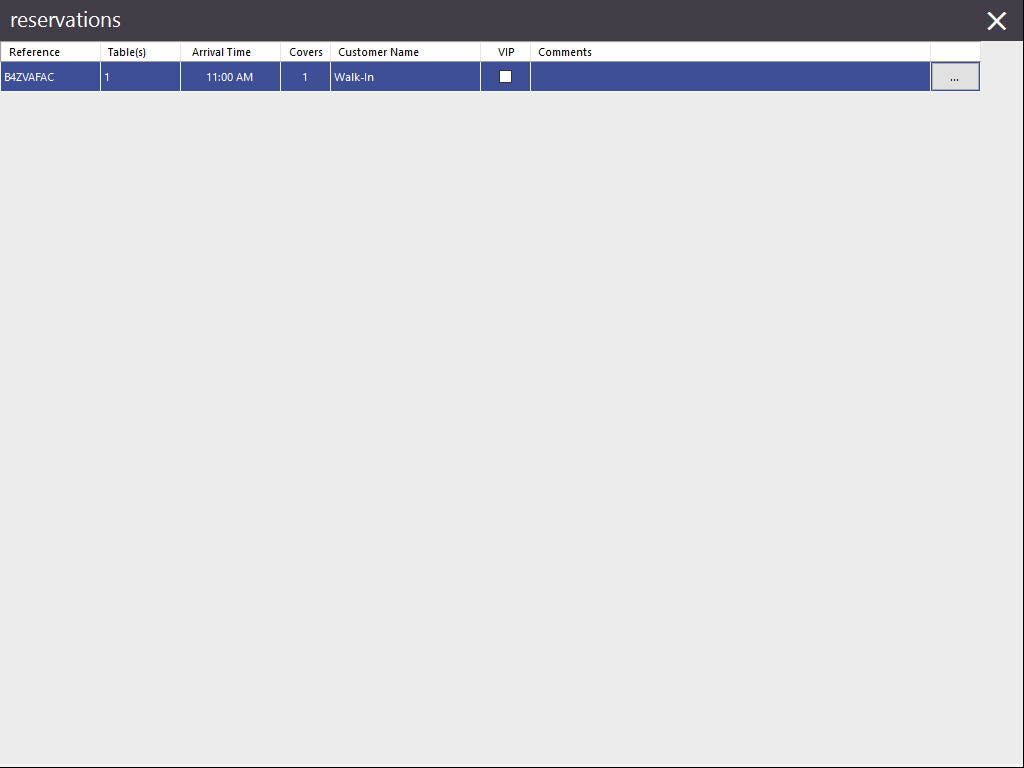
Pressing the '...' button located next to the reservation entry will show additional details.
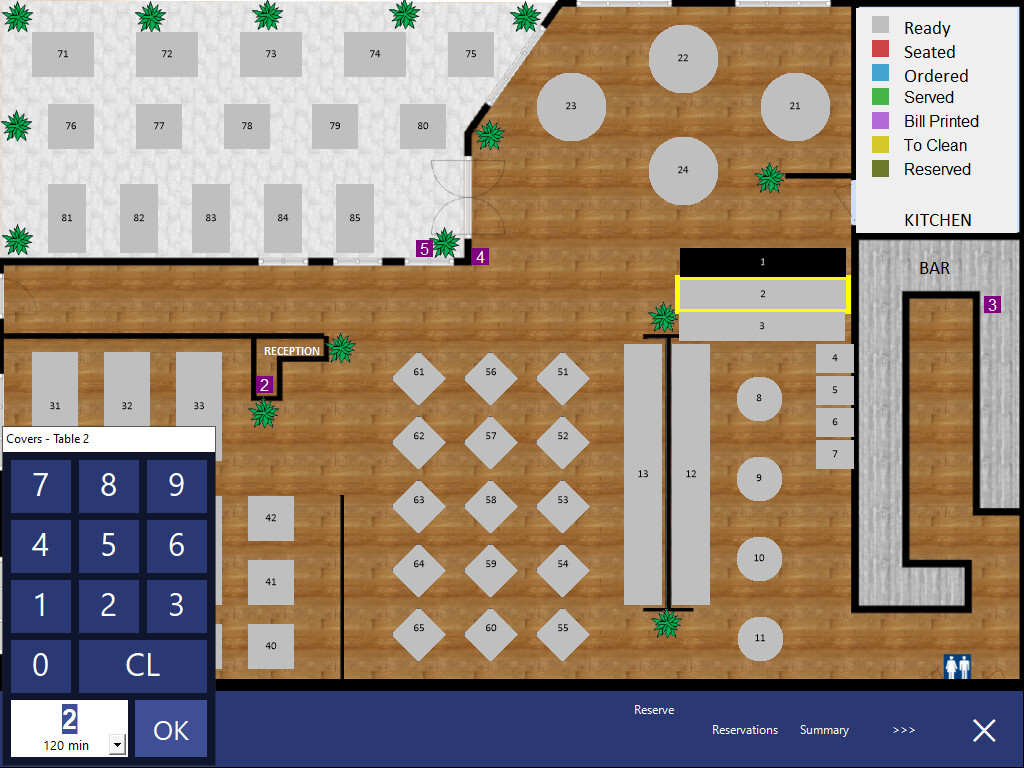
Select a table from the Table Map and press the 'Occupy' button (the Occupy button is located on the bottom-left corner of the Table Map screen).
Enter the number of Guests/Covers and the time duration > OK
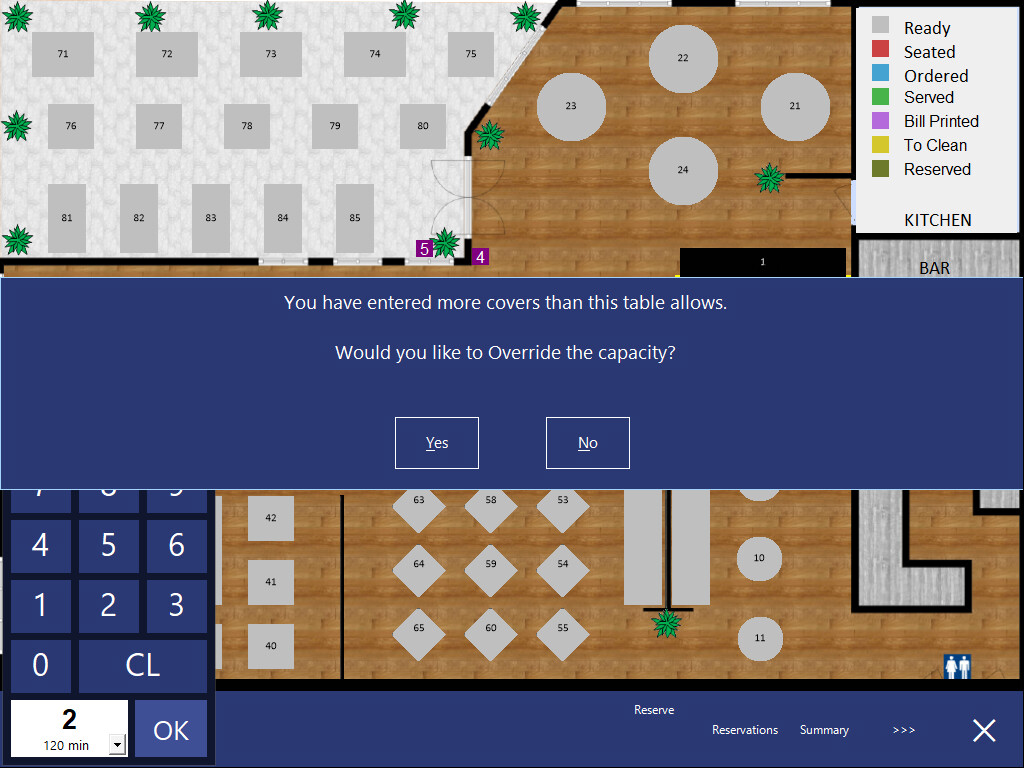
If the number of Covers entered exceeds the number of covers allowed for the table (when using ResDiary, ResDiary determines the maximum number of covers on a table, not Idealpos), the below prompt will be displayed.
Press 'Yes' to override the capacity.
If 'No' is pressed, further prompts will be displayed which will enable tables to be joined - click here for further details on how to join tables together.
The number of covers allowed for a table can be modified by logging into ResDiary > Settings > Table Management > Tables > Press the 'Edit' button next to the table number that require the maximum covers to be modified.
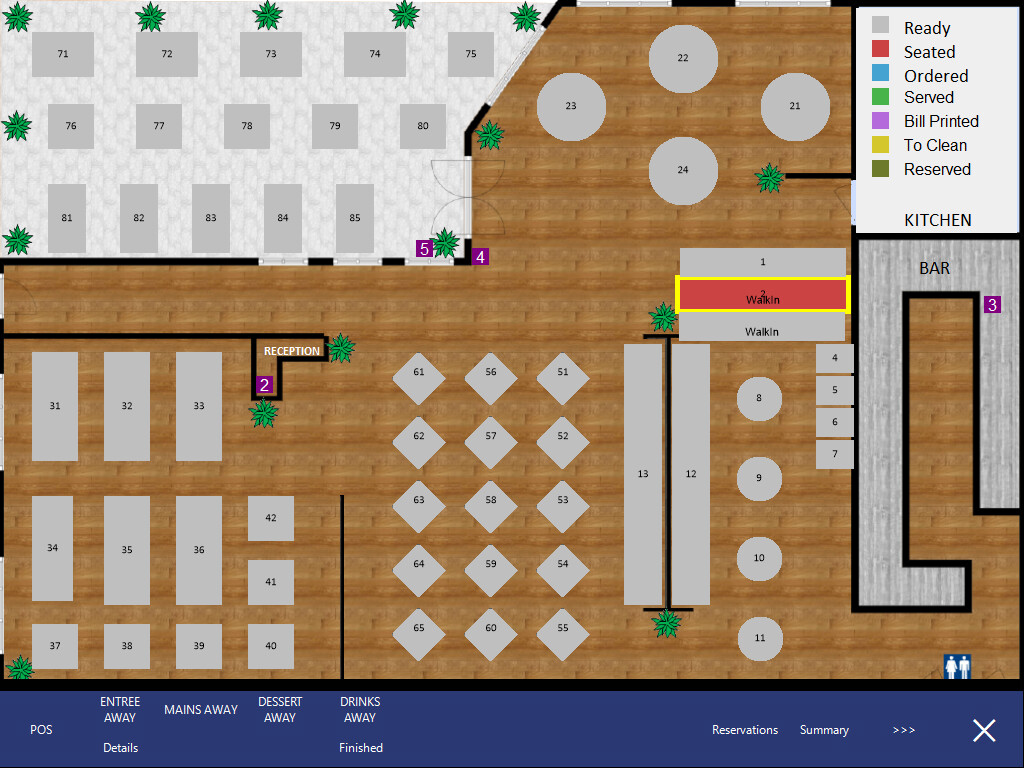
After occupying the table, the status will change to seated and will show 'Walk-In' within the table.
All reservations for a Table must be made via the ResDiary web interface.
For information on how to book a reservation in ResDiary, click on the link below.
Within the ResDiary grid, select a table timeslot.
The below example shows the Table 1 timeslot after 10:30AM being selected (annotated as a blue rectangle).
If the timeslot that was selected occurs in the next 30 minutes or less, the 'Create New Walk In' prompt will be displayed.
Press the 'Advance Booking' button on the top-right corner of the 'Create New Walk In' prompt.
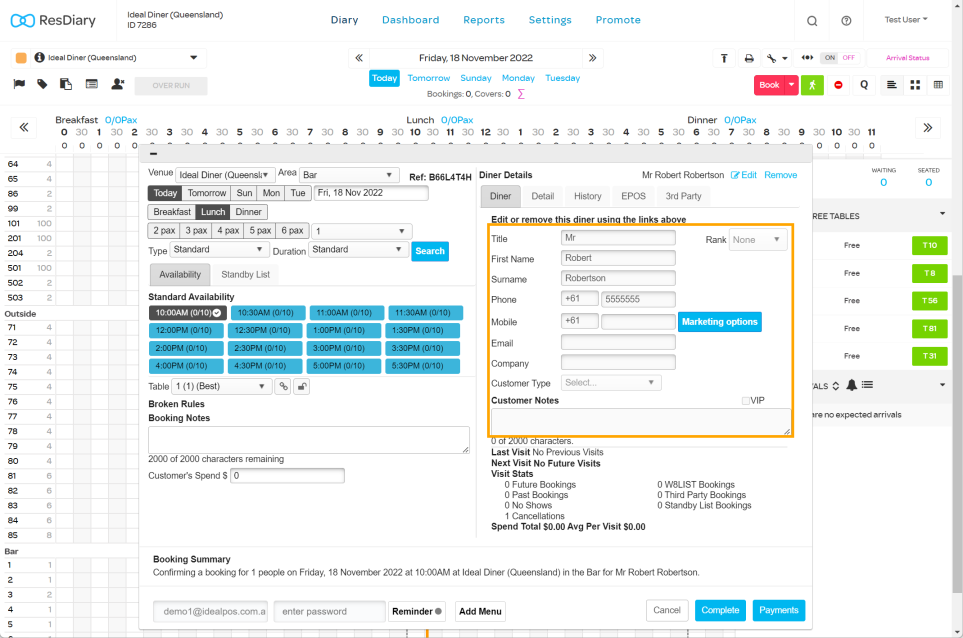
After pressing 'Advance Booking', the details of the guest can be entered.
If the timeslot selected occurs greater than 30 minutes from the current time, the 'Create New Walk In' prompt shown above will not be displayed, and instead, the 'Advance Booking' prompt will be displayed as shown below.
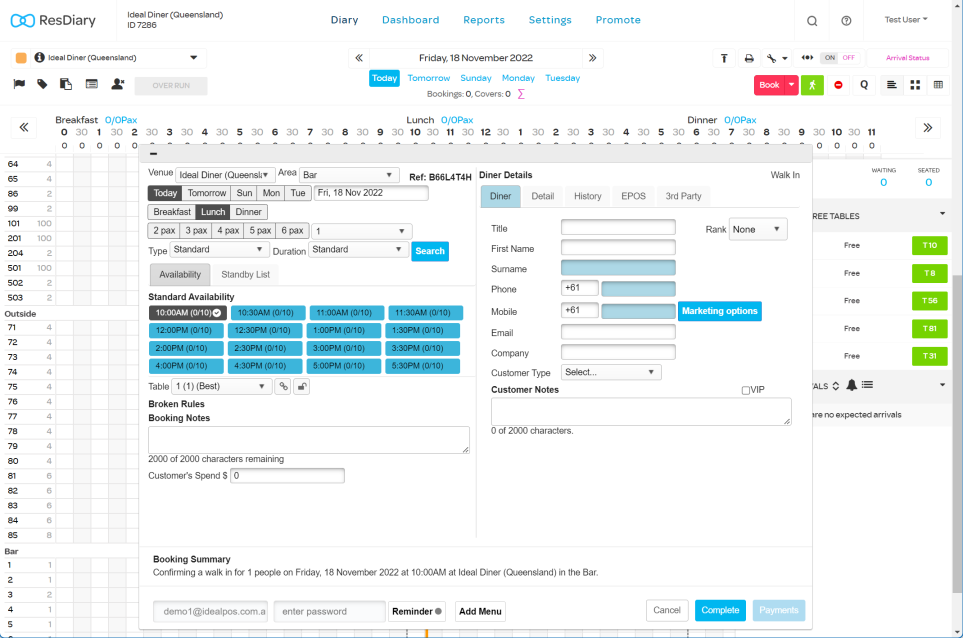
Enter the guest's details, then press the 'Complete' button at the bottom of the Advance Booking prompt.
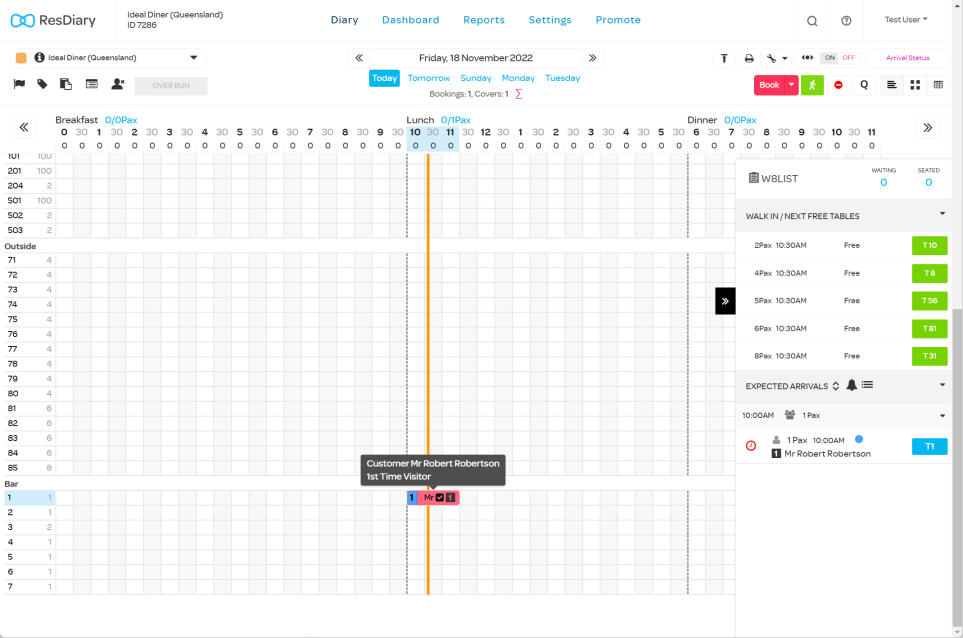
The customer's booking will appear in the ResDiary grid.
All guests that have a booking must be seated at a Table via the ResDiary web interface.
For information on how to seat a registered guest at a table, click on the link below.
To seat a guest at a table, go to ResDiary and click on the booking within the ResDiary grid.
After clicking on the booking in the ResDiary grid, a menu will be displayed > Press 'Fully Seated' or 'Partially Seated'.
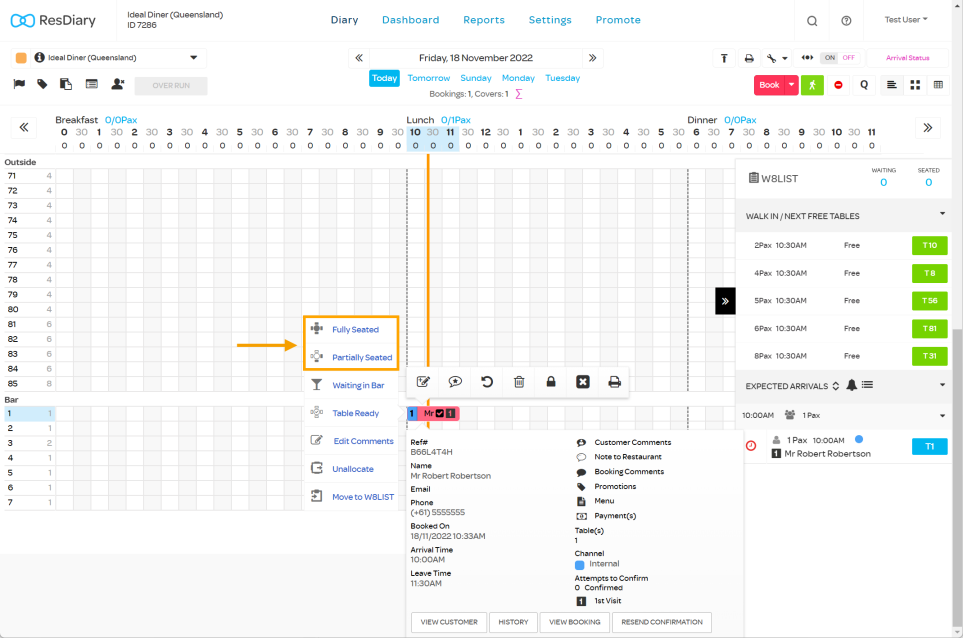
If Partially Seated is pressed, the reservation entry in the ResDiary grid will appear as a yellow colour.
If Fully Seated is pressed, the reservation entry in the ResDiary grid will appear as a green colour.
The below example shows the booking in ResDiary after pressing the 'Fully Seated' option (shown in green colour).
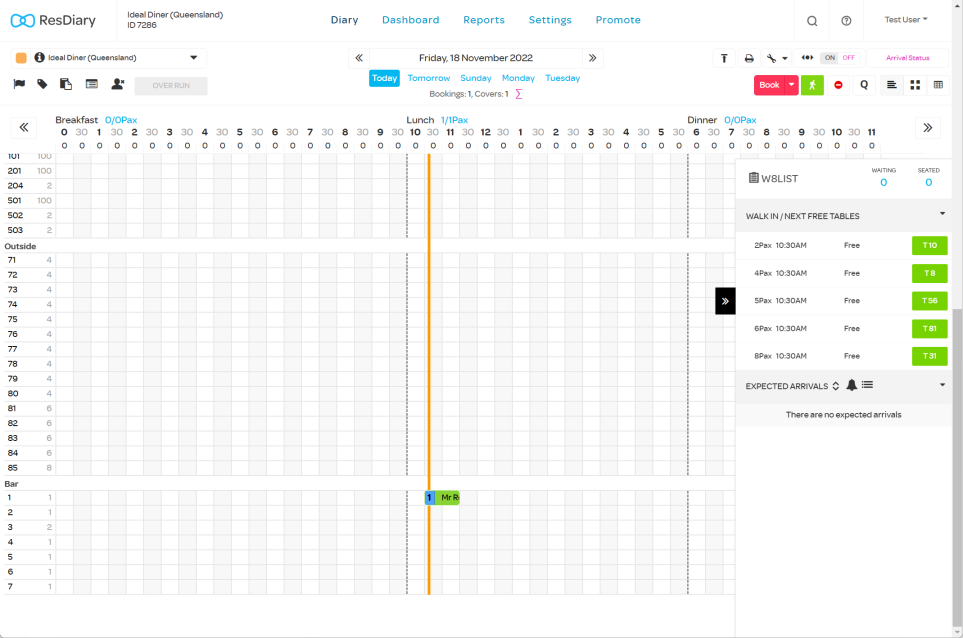
After pressing either 'Fully Seated' or 'Partially Seated' in ResDiary, the Table's status on the Idealpos Table Map will change to 'Seated' and will show the guest's name on the table.
If the covers entered exceed the capacity defined on the Table in ResDiary (when seating a guest at a table via the Idealpos Table Map by selecting a Table and pressing the 'Occupy' button), you have two options:

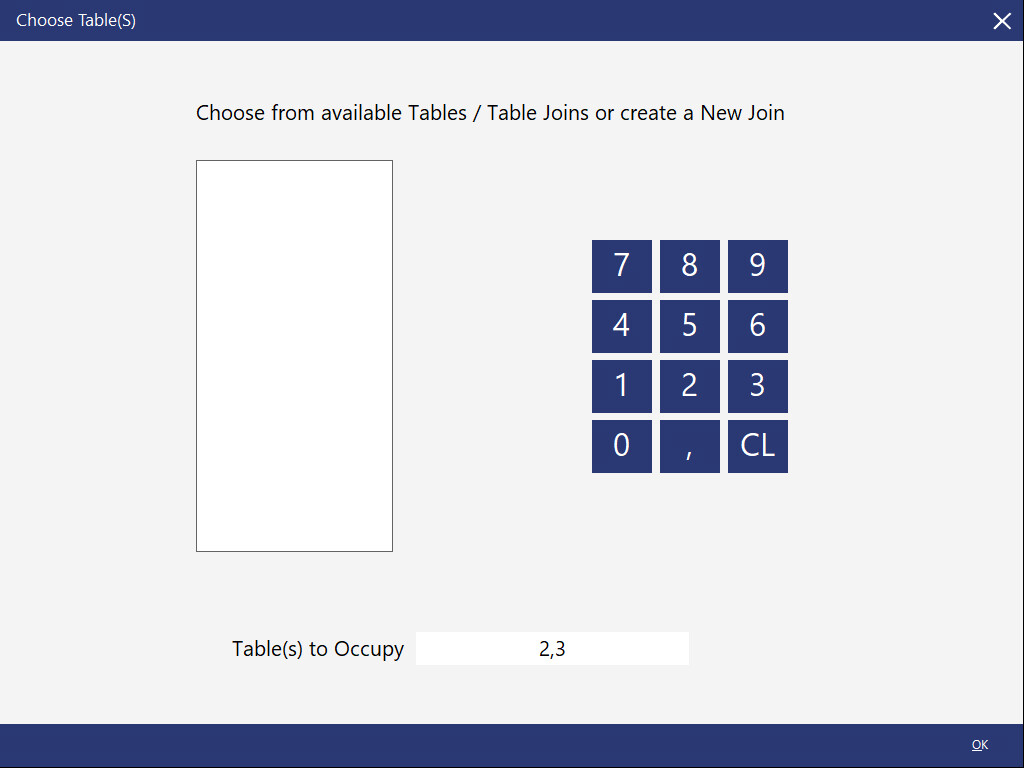
If you press NO (to join two or more tables together), you can select which tables on the Table Map will be joined.
Enter each Table Number that will be joined, ensuring that the comma button [,] is pressed after each Table Number that is entered.
Once the Table Numbers have been entered, press the 'OK' button on the bottom-right corner to continue.
Confirm the two (or more) tables that are about to be occupied by pressing Yes.

The tables will then be taken.
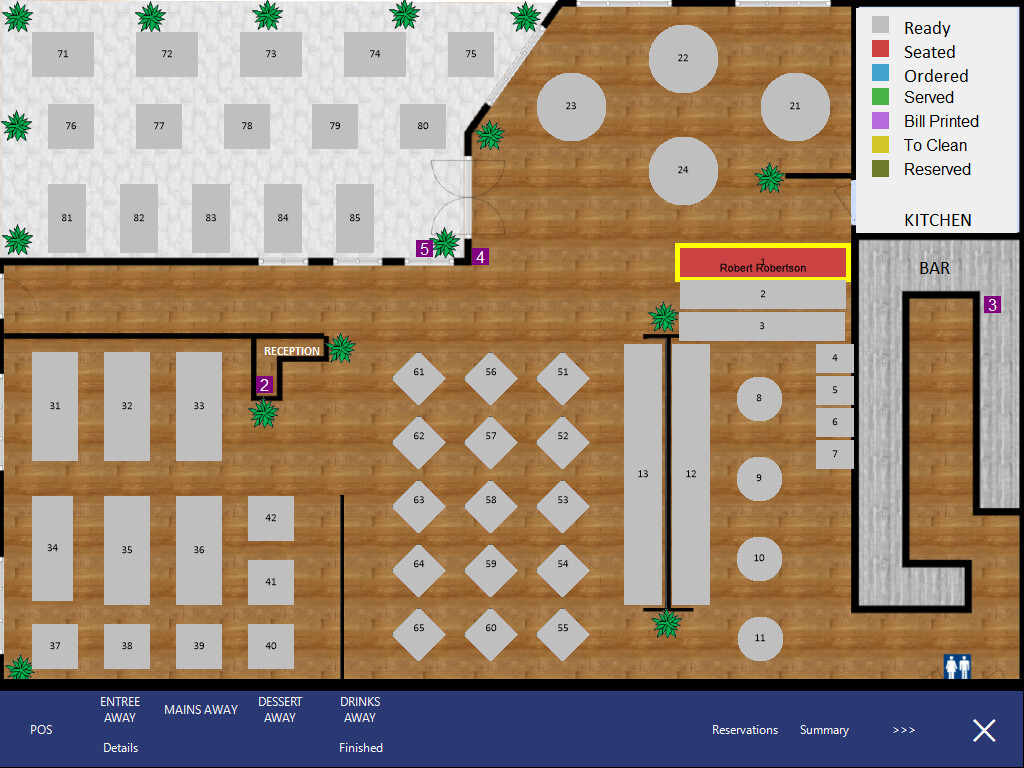
Both tables will show the Customer Name (e.g. Walk In or Customer's Name).
Only one table will show the status (red colour corresponding to the 'Seated' status) while the other table will lose its table number (the table below Table 2 does not show the Table Number nor does it show the red colour corresponding to the 'Seated' status).
The slot occupied in the ResDiary grid will reflect the joined tables, as shown in the example below.
Any table status function that is used will change the table in the Table Map and be reflected in ResDiary.
Status' that are sent to ResDiary include Entrée Away, Mains Away, Desserts Away, Drinks Away, Bill Printed, Table Paid and To Clean/Finish.
The below example shows the booking in ResDiary with the 'Drinks Away' status (indicated by the small drinks image shown on the right-hand side of the booking slot).